Installing a shower in a small bathroom is perhaps the best option if there is a lack of space in this room. However, this pleasure is not the cheapest, so many owners decide to make a shower cabin with their own hands.
Of course, you will still have to purchase some of the factory-made spare parts, but the costs for them will not go in any comparison with the cost of the whole product. And although, home-made shower cabins are not mobile, unlike the industrial version, they will last much longer.
Do-it-yourself shower cubicle made of tiles: photo instruction
The most common material used to equip homemade shower cabins is ceramic tiles, which, in fact, is quite reasonable. Firstly, it is the most suitable material for rooms with high humidity. Secondly, ceramics are characterized by fairly good strength, reliability and durability.
 Another important factor in favor of tiles is their hygiene. There are two options to make a shower cabin with your own hands from tiles (photos of step-by-step production will be presented below):
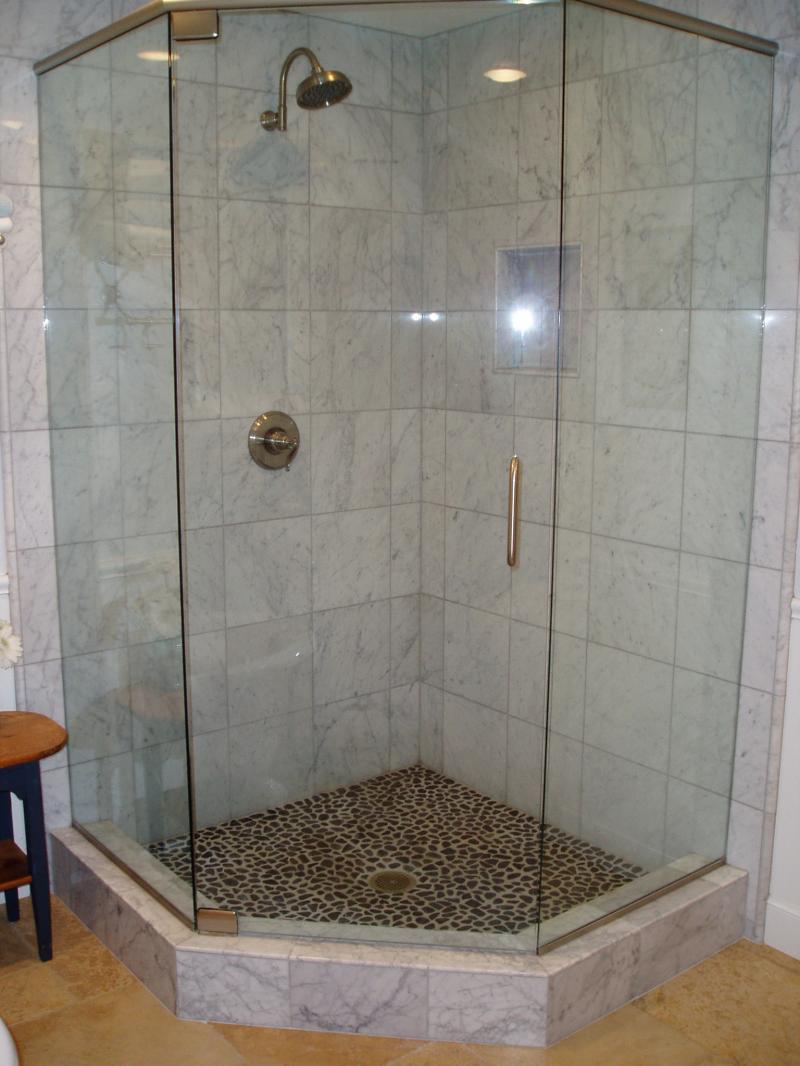
- You can make a shower stall from tiles with your own hands without a pallet. Basically, it is a simple ceramic tile wall and floor cladding. This method is distinguished by simpler repair and finishing work, but requires a carefully thought-out installation of communications.
- In addition, there is a more complex option, when the shower tray is also made by hand, and subsequently tiled. But the supply of communications in this case is much easier, they are perfectly hidden under the bottom of the pallet.
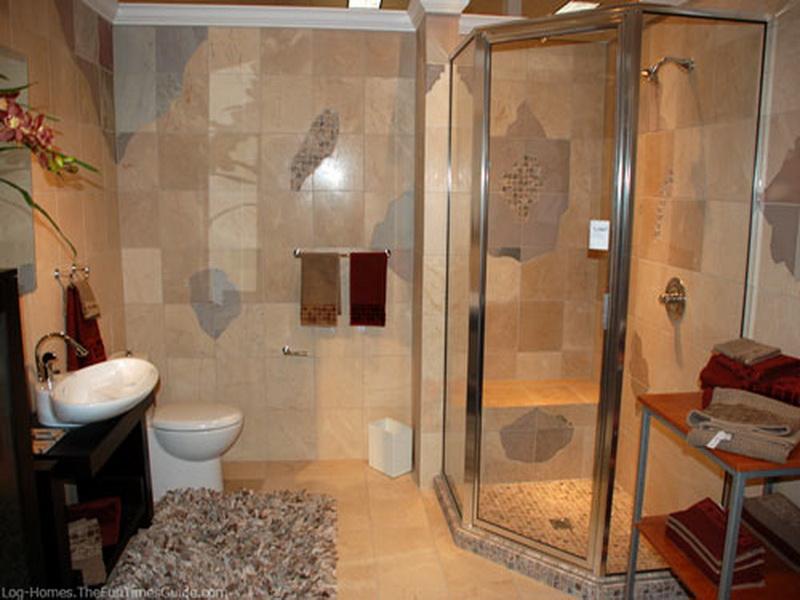
In both cases, bathroom partitions are used as one, two or three walls of the cubicle. By the way, it is for this reason that homemade showers are usually mounted in a corner or niche. The rest of the shower stall will have to be purchased or made independently from acrylic or glass.
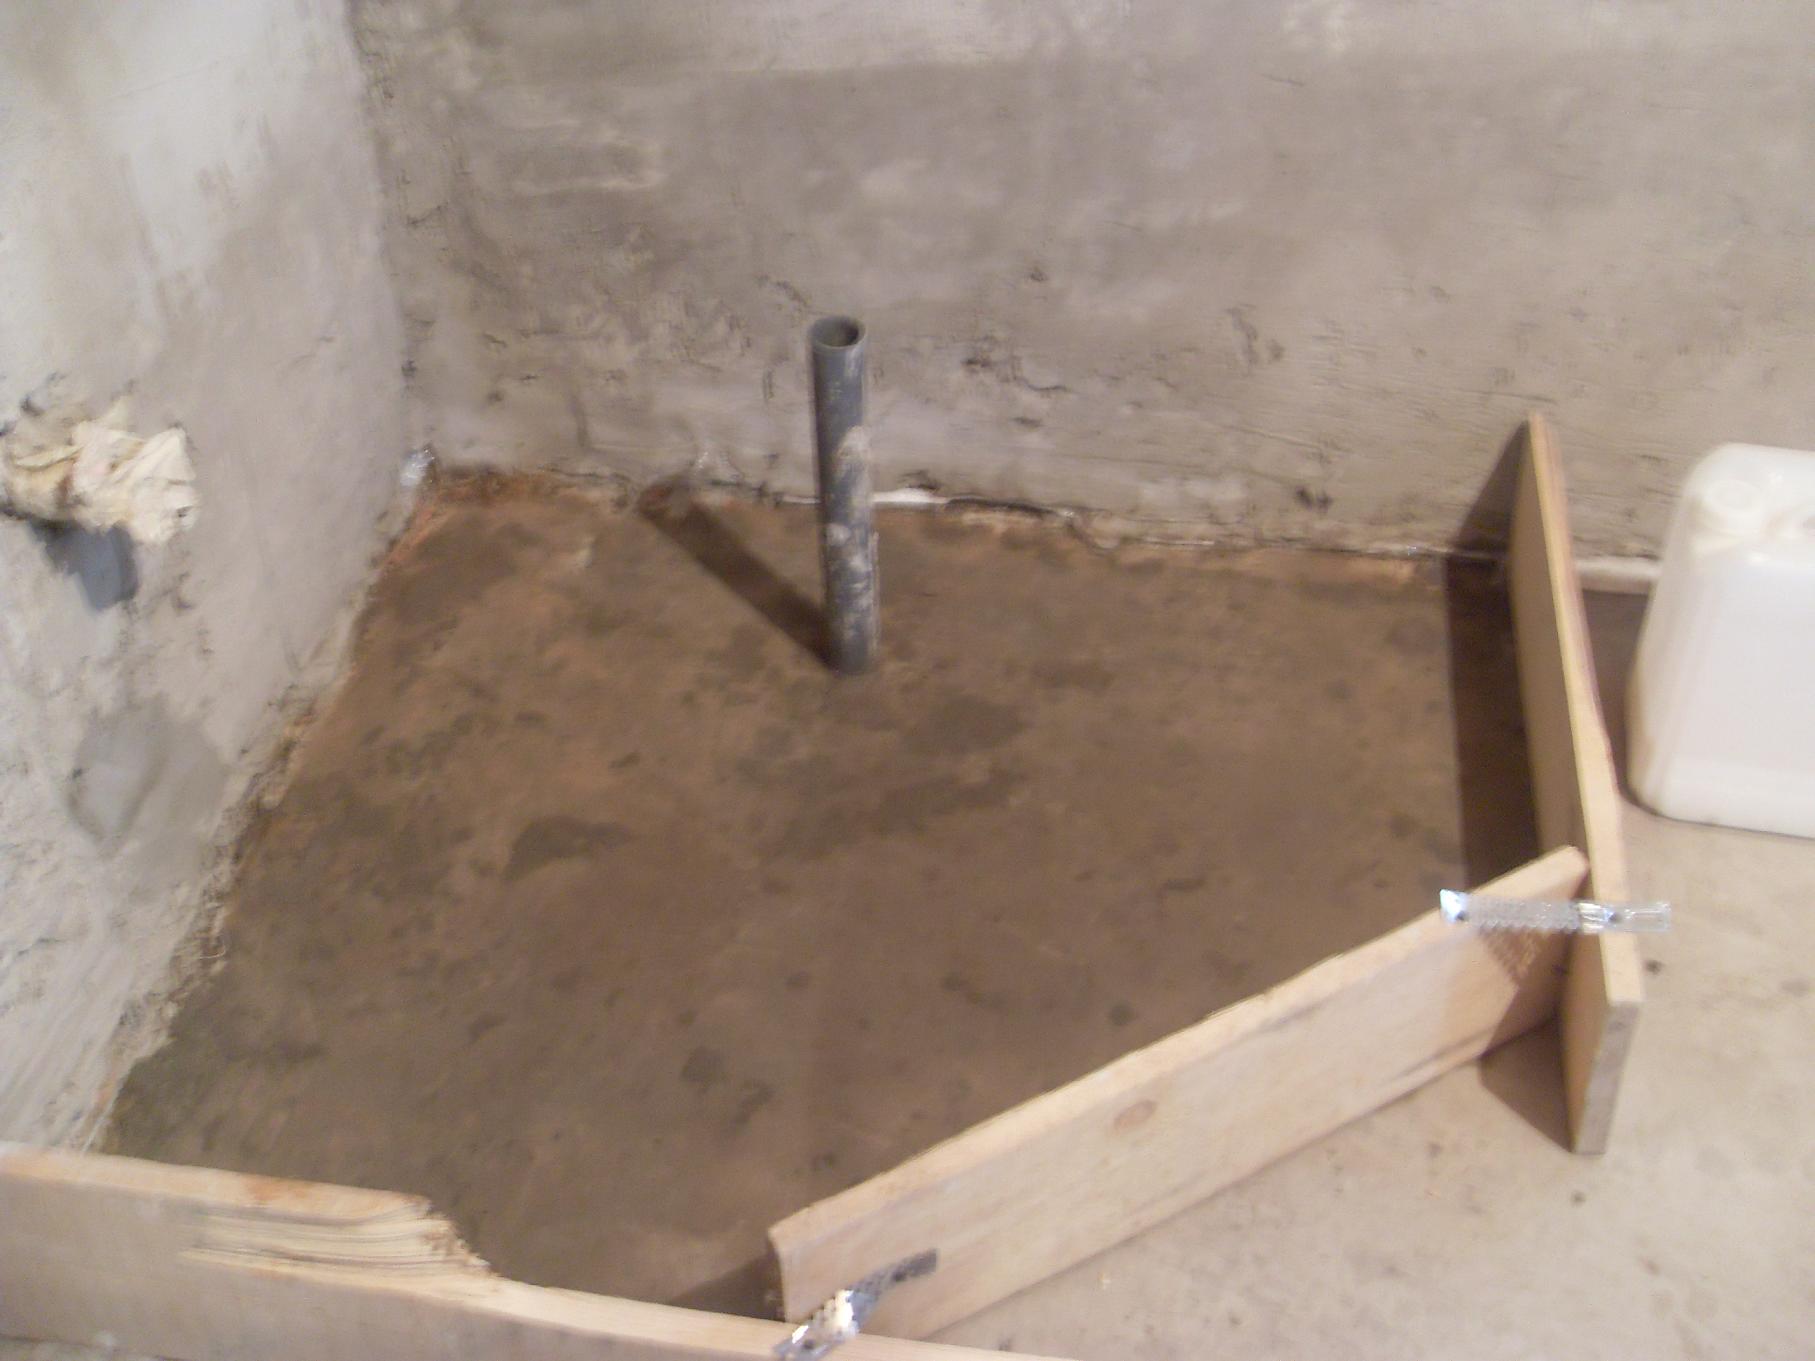
Do-it-yourself shower cabin without a pallet: preparation of the base
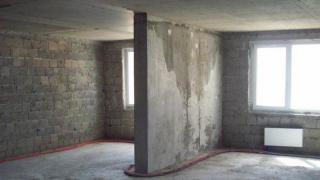
Before you start installing a shower cabin with your own hands without a pallet, first of all, you need to take care of high-quality protection of the floor and walls of the bathroom from leaks at the place of installation of the shower. Therefore, it is first required to perform additional waterproofing, while it is recommended to carry out it over the entire area of the bathroom:
- To do this, the floor and walls involved in the installation of the cabin must be cleaned up to the concrete floor, on top of which the waterproofing is performed. For this purpose, bituminous mastic can be applied, but the best option would be to use modern waterproofing materials, laid in 2-3 layers. The joints of the floor and wall slabs (especially the corners) are pre-glued with non-woven tape, and the outlet of the sewer pipe is insulated with a special gasket.
- At the next stage, the bathroom floor is screed, while a cement-based mixture is necessarily used, since gypsum is afraid of moisture. For strength, the screed can be reinforced with a metal mesh.
- Lay communications. Here you will have to puzzle over how to lay the pipes in such a way that subsequently the water does not stagnate in the drain, but flows freely into the sewer. Otherwise, unpleasant odors are provided to you.
- Now you can install a drain or, as plumbers call it, a drain, which is also hermetically sealed with a gasket at the junction with the pipe. As a rule, the drain hole is located closer to the wall opposite to the entrance. Here it will not interfere with taking a shower, and communication will be much easier to bring.
- If required, lay a layer of the main filler - expanded polystyrene or aerated concrete and fill in the finishing screed. At the same time, a slight slope towards the drain is observed at the rate of 0.7-1 cm per linear meter of the floor.
Shower cabin on the site
There is another option for making a shower cabin without a pallet. In order to simplify the laying of communications, the floor is specially raised above the base:
- For this, a wooden formwork is prepared at the place of installation of the shower stall.
- Prepare the floor (perform waterproofing and pre-screed).
- A layer of brick is laid out on the site and a ladder is installed.
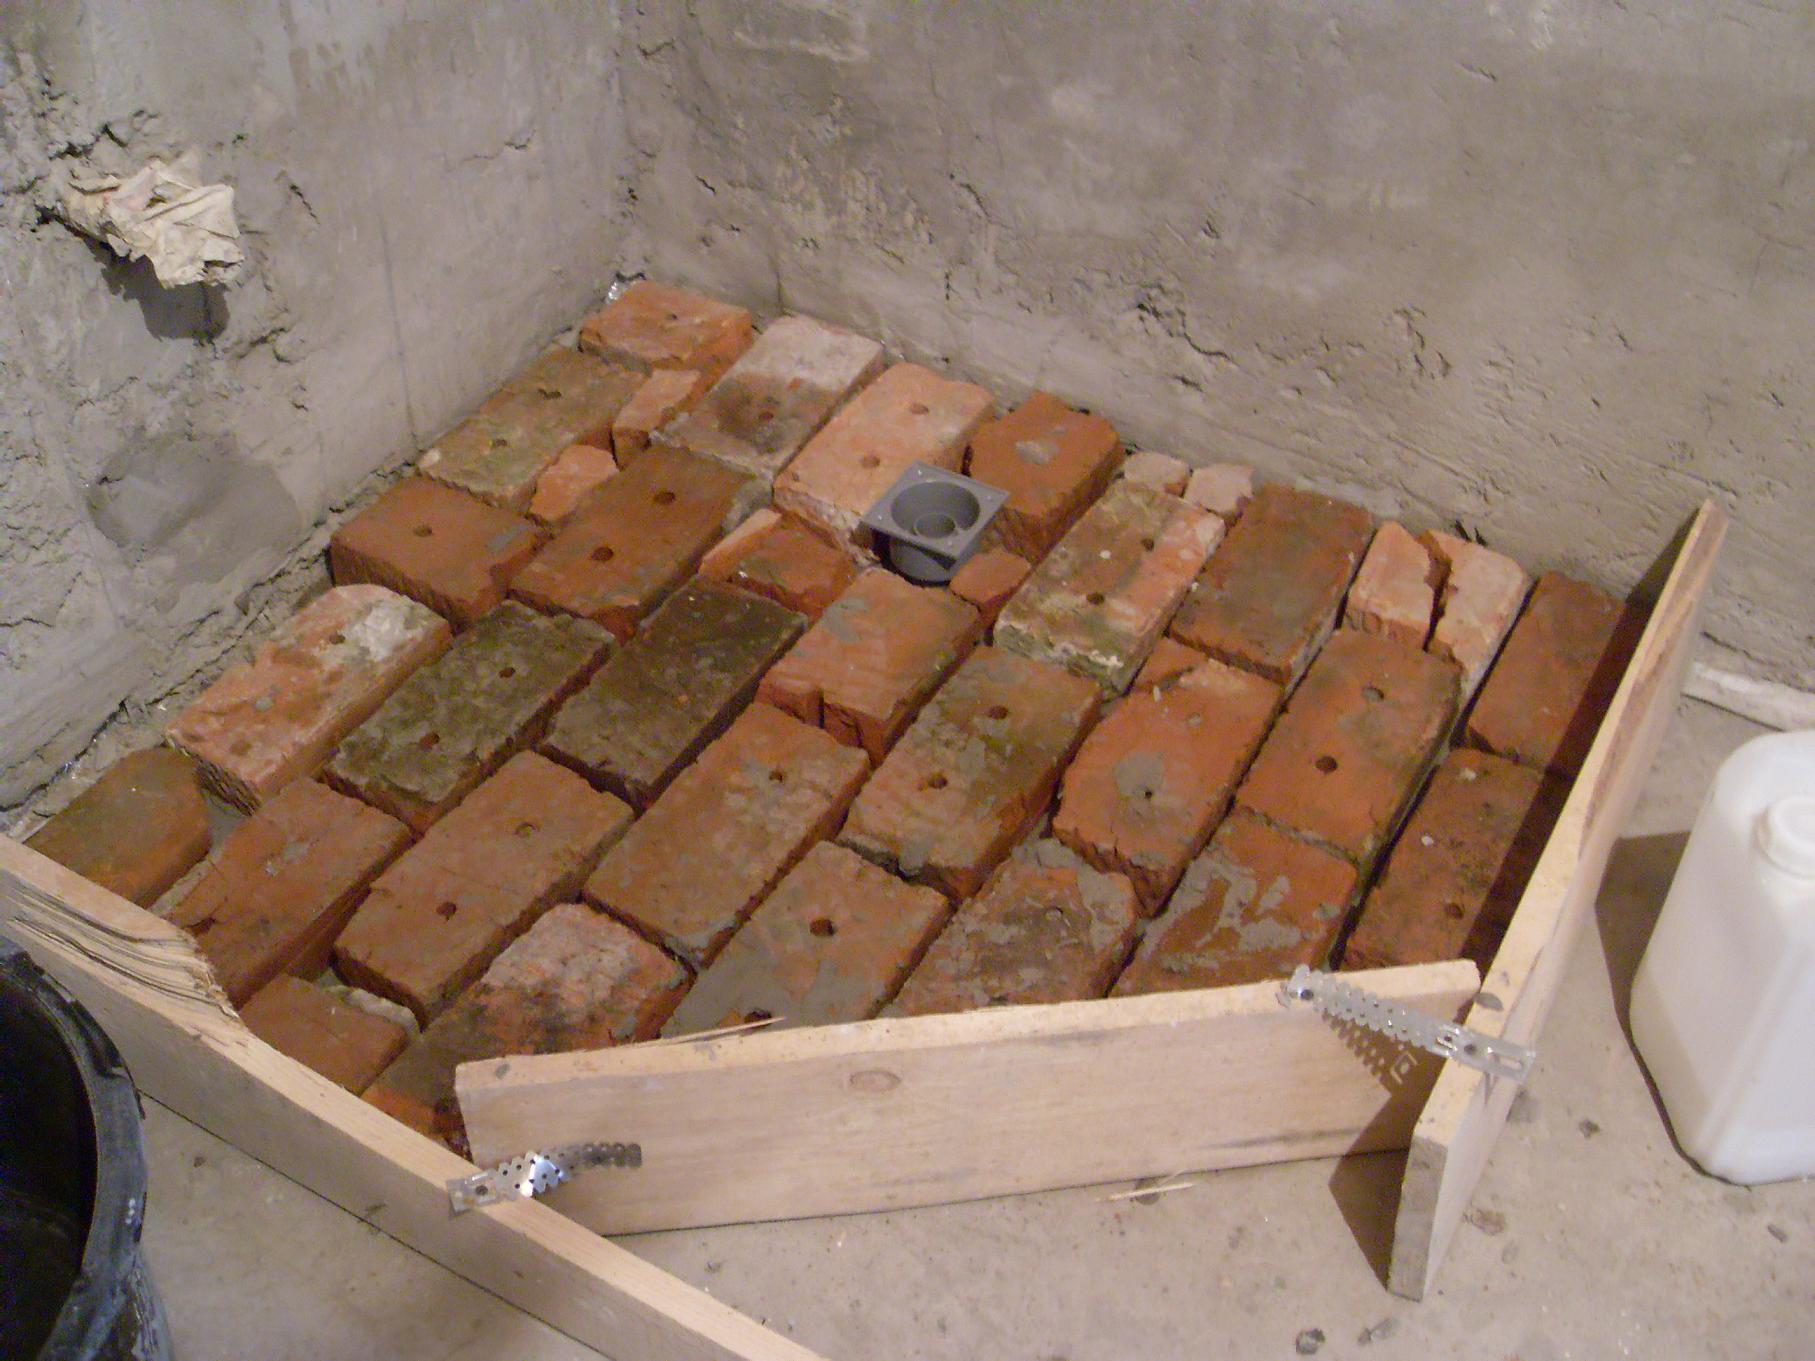
- The formwork is poured with a screed in compliance with the technology.
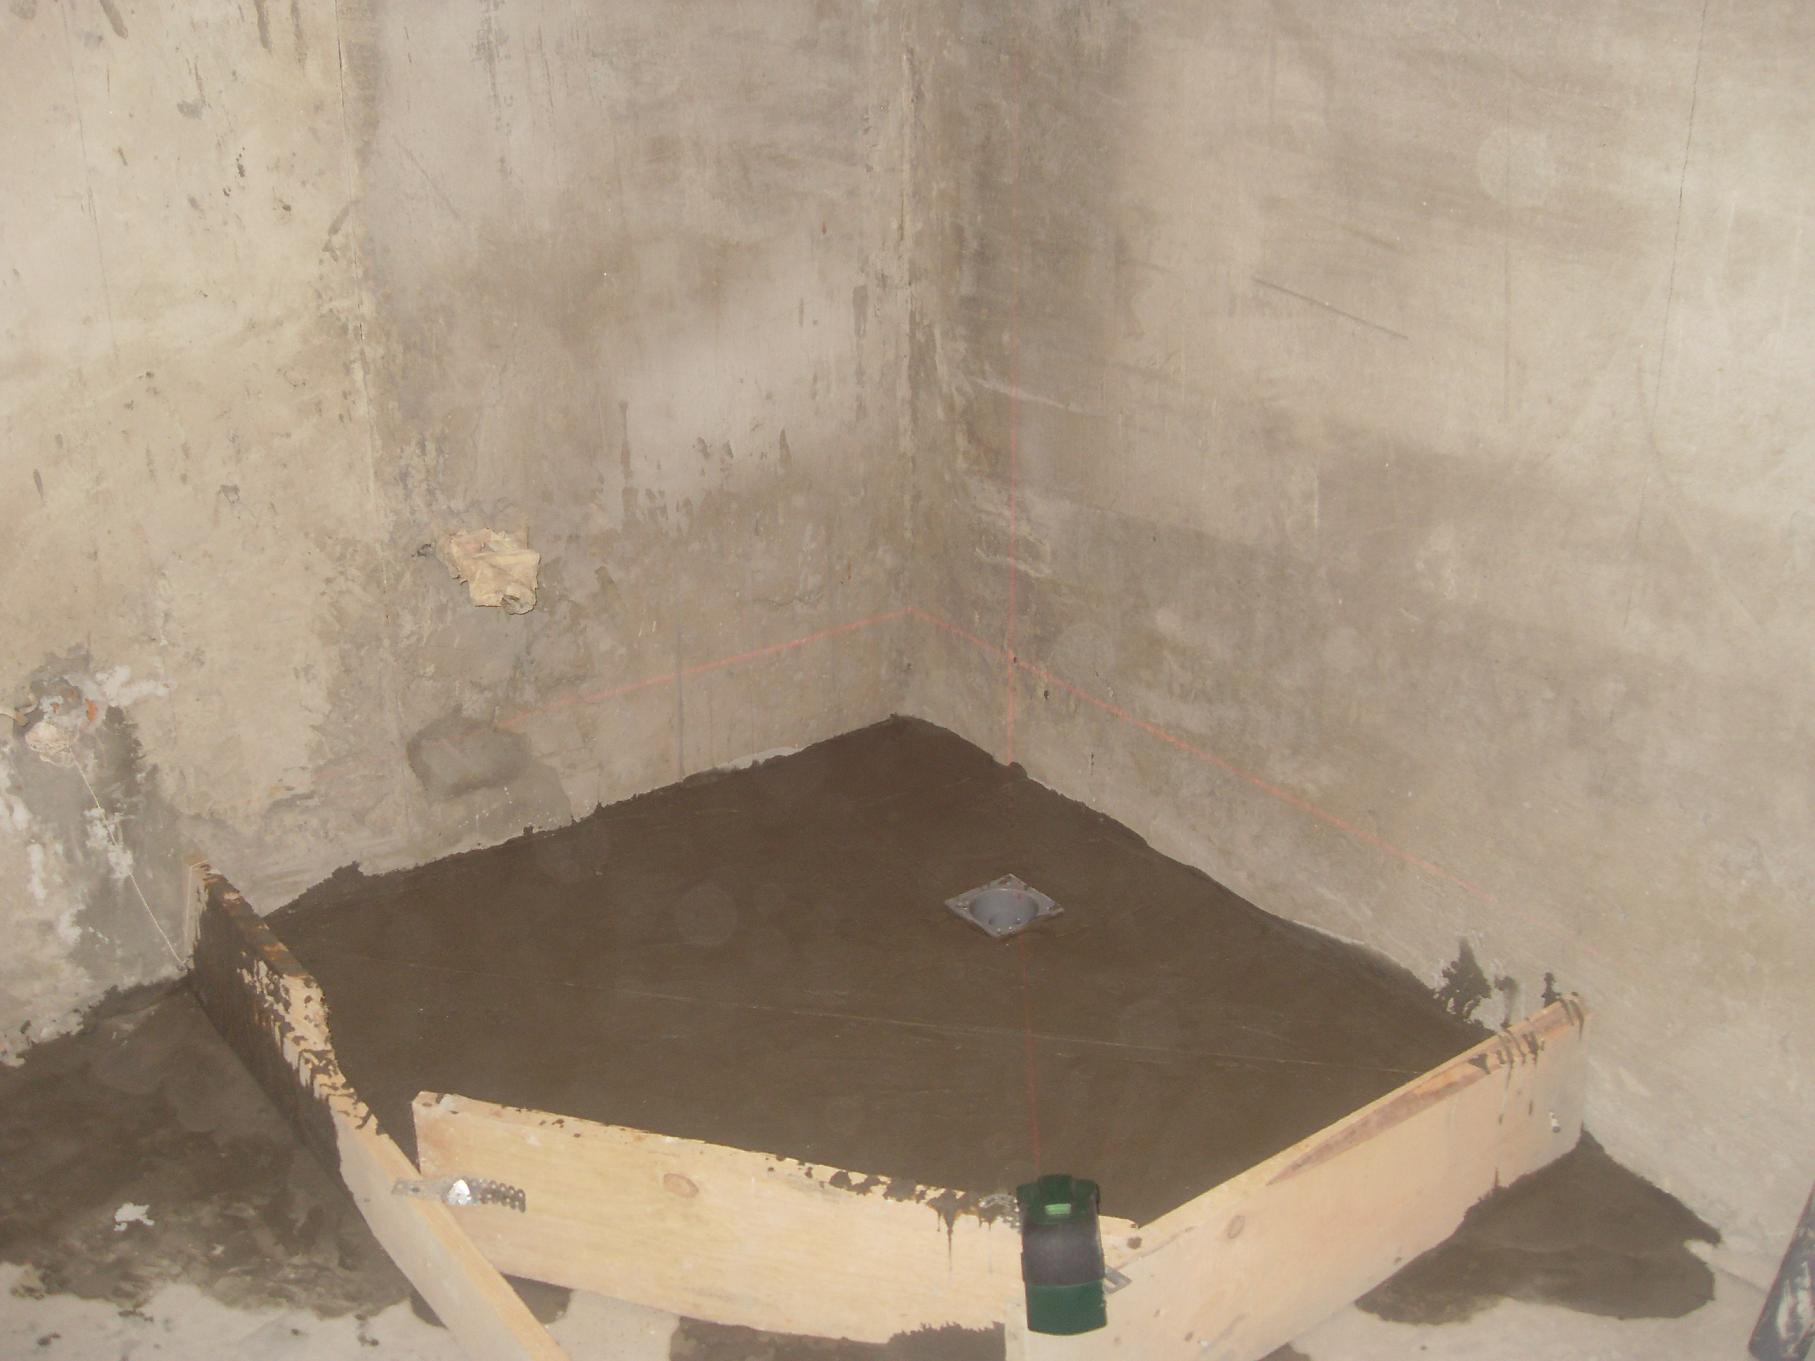
- Remove the formwork and check the horizontal surface of the site along the edges.
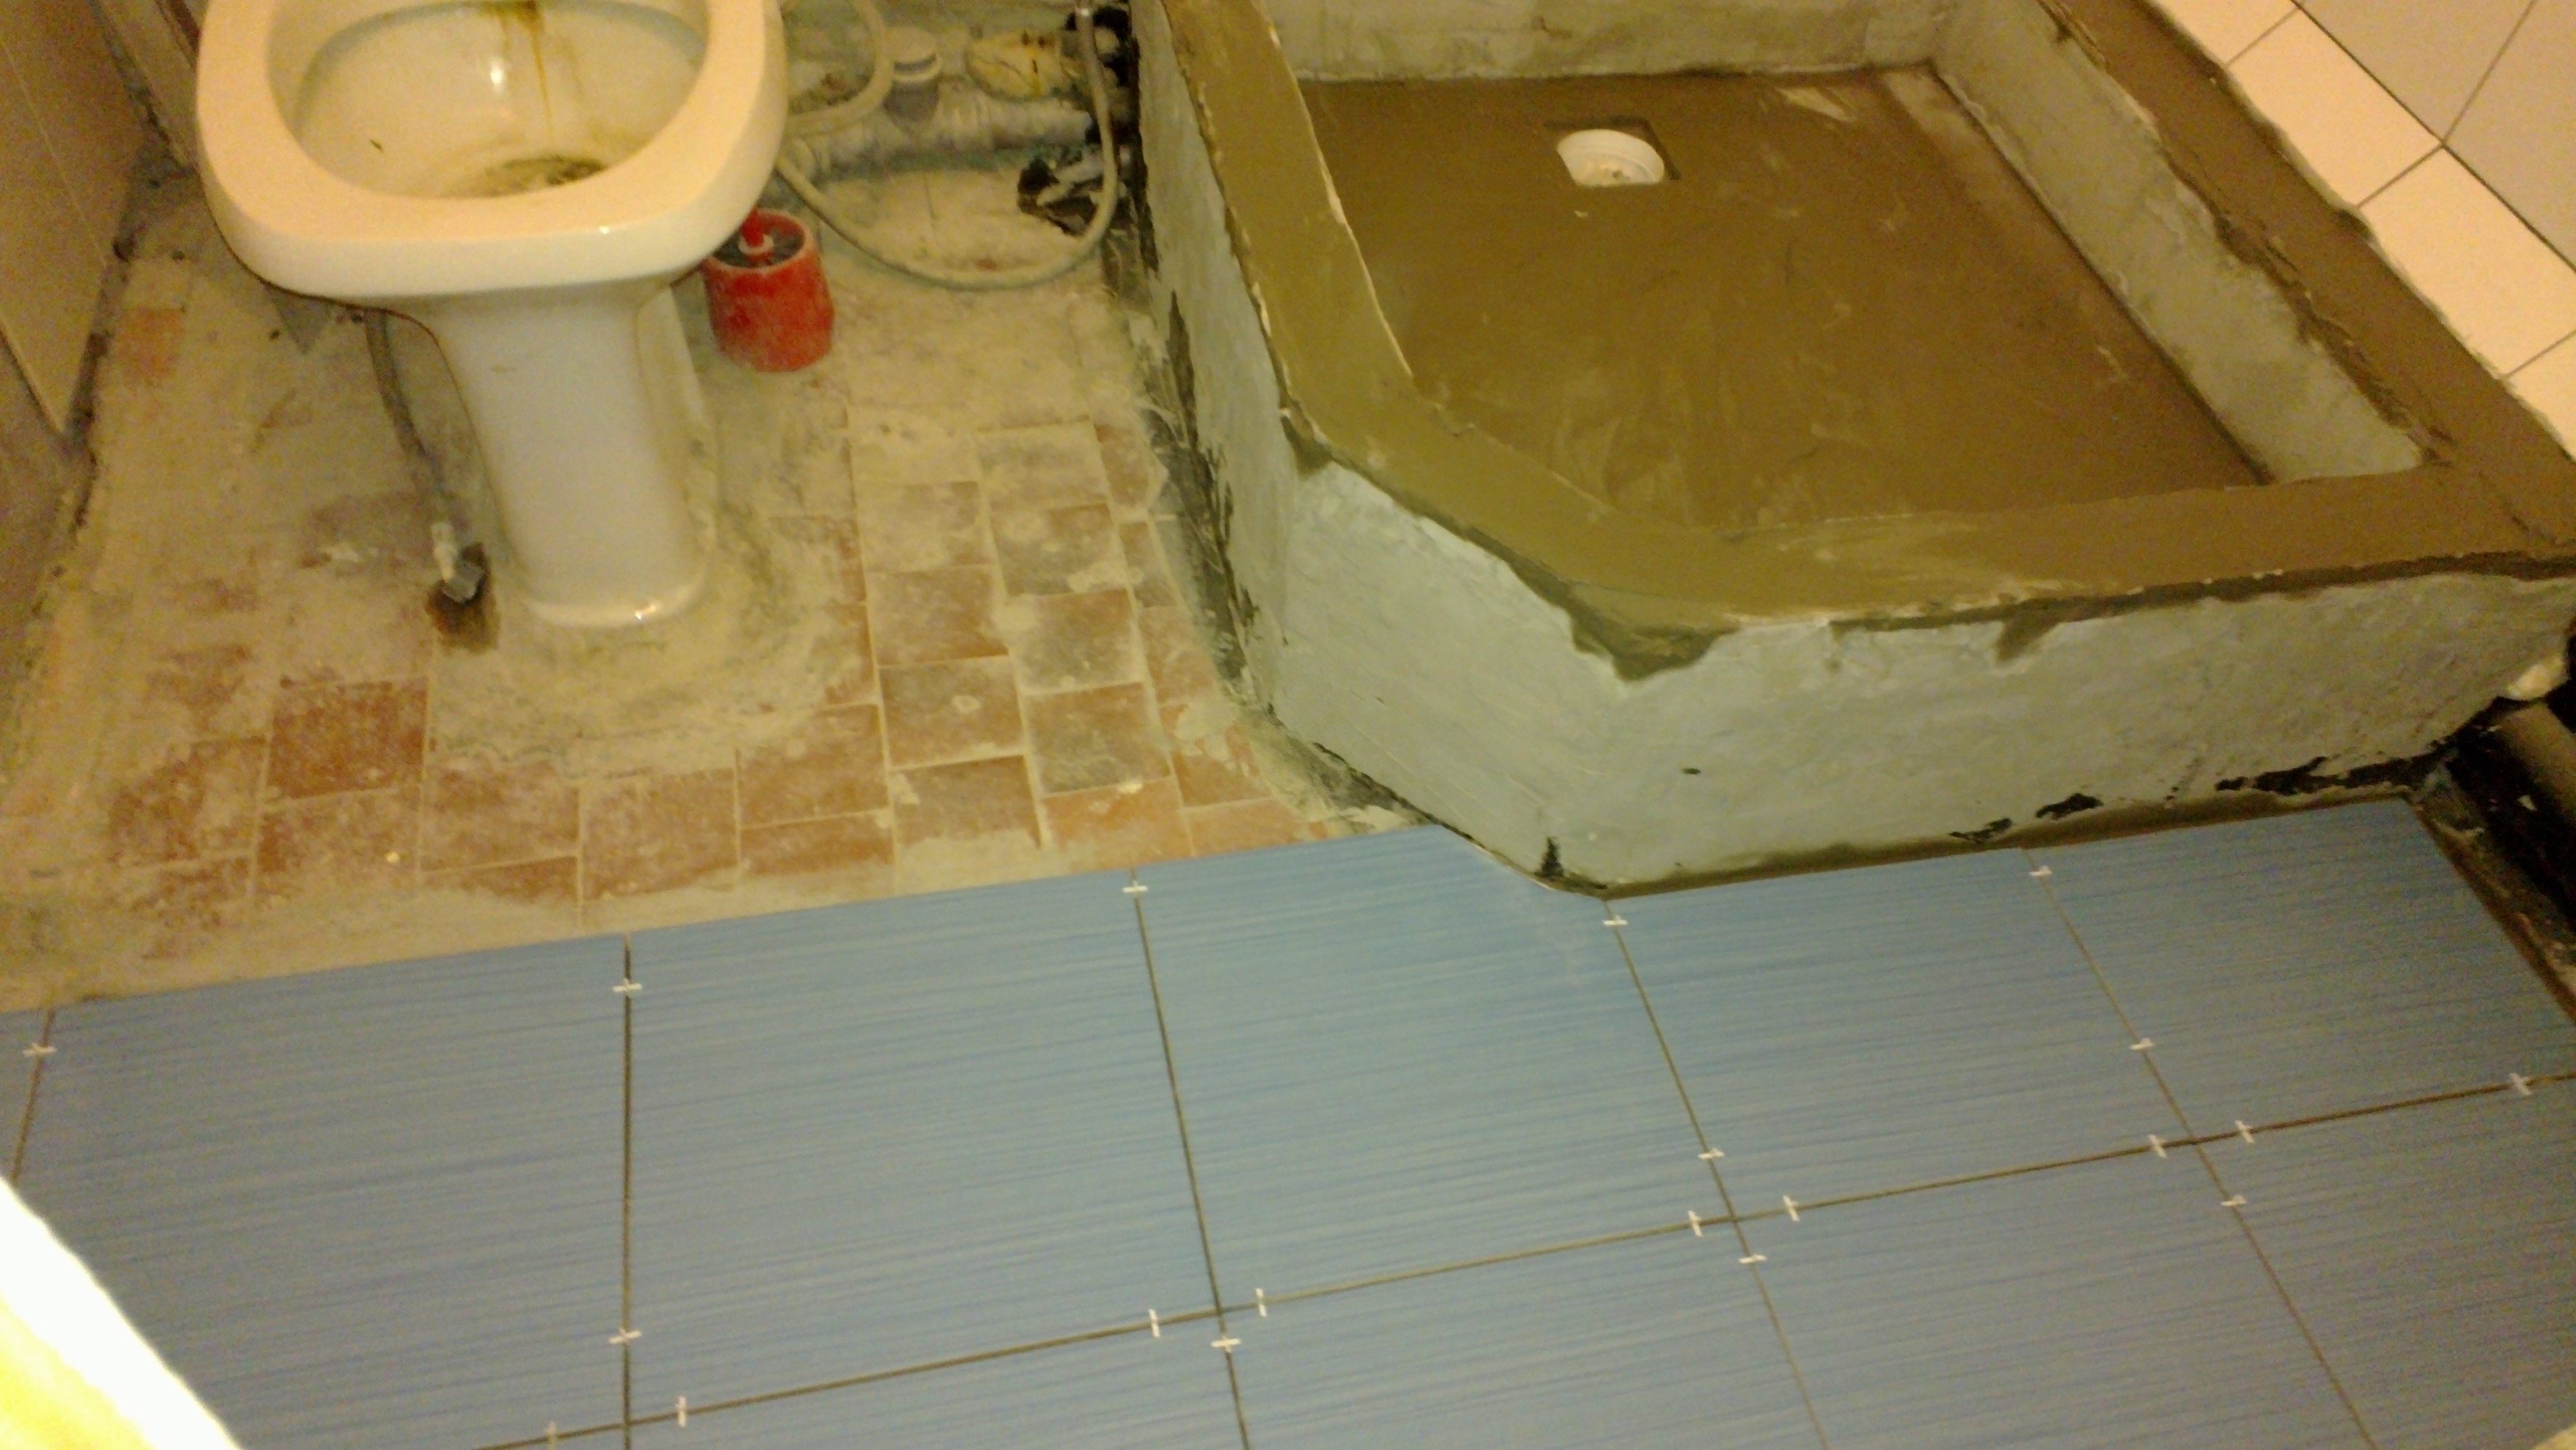
The finished base is subsequently tiled.
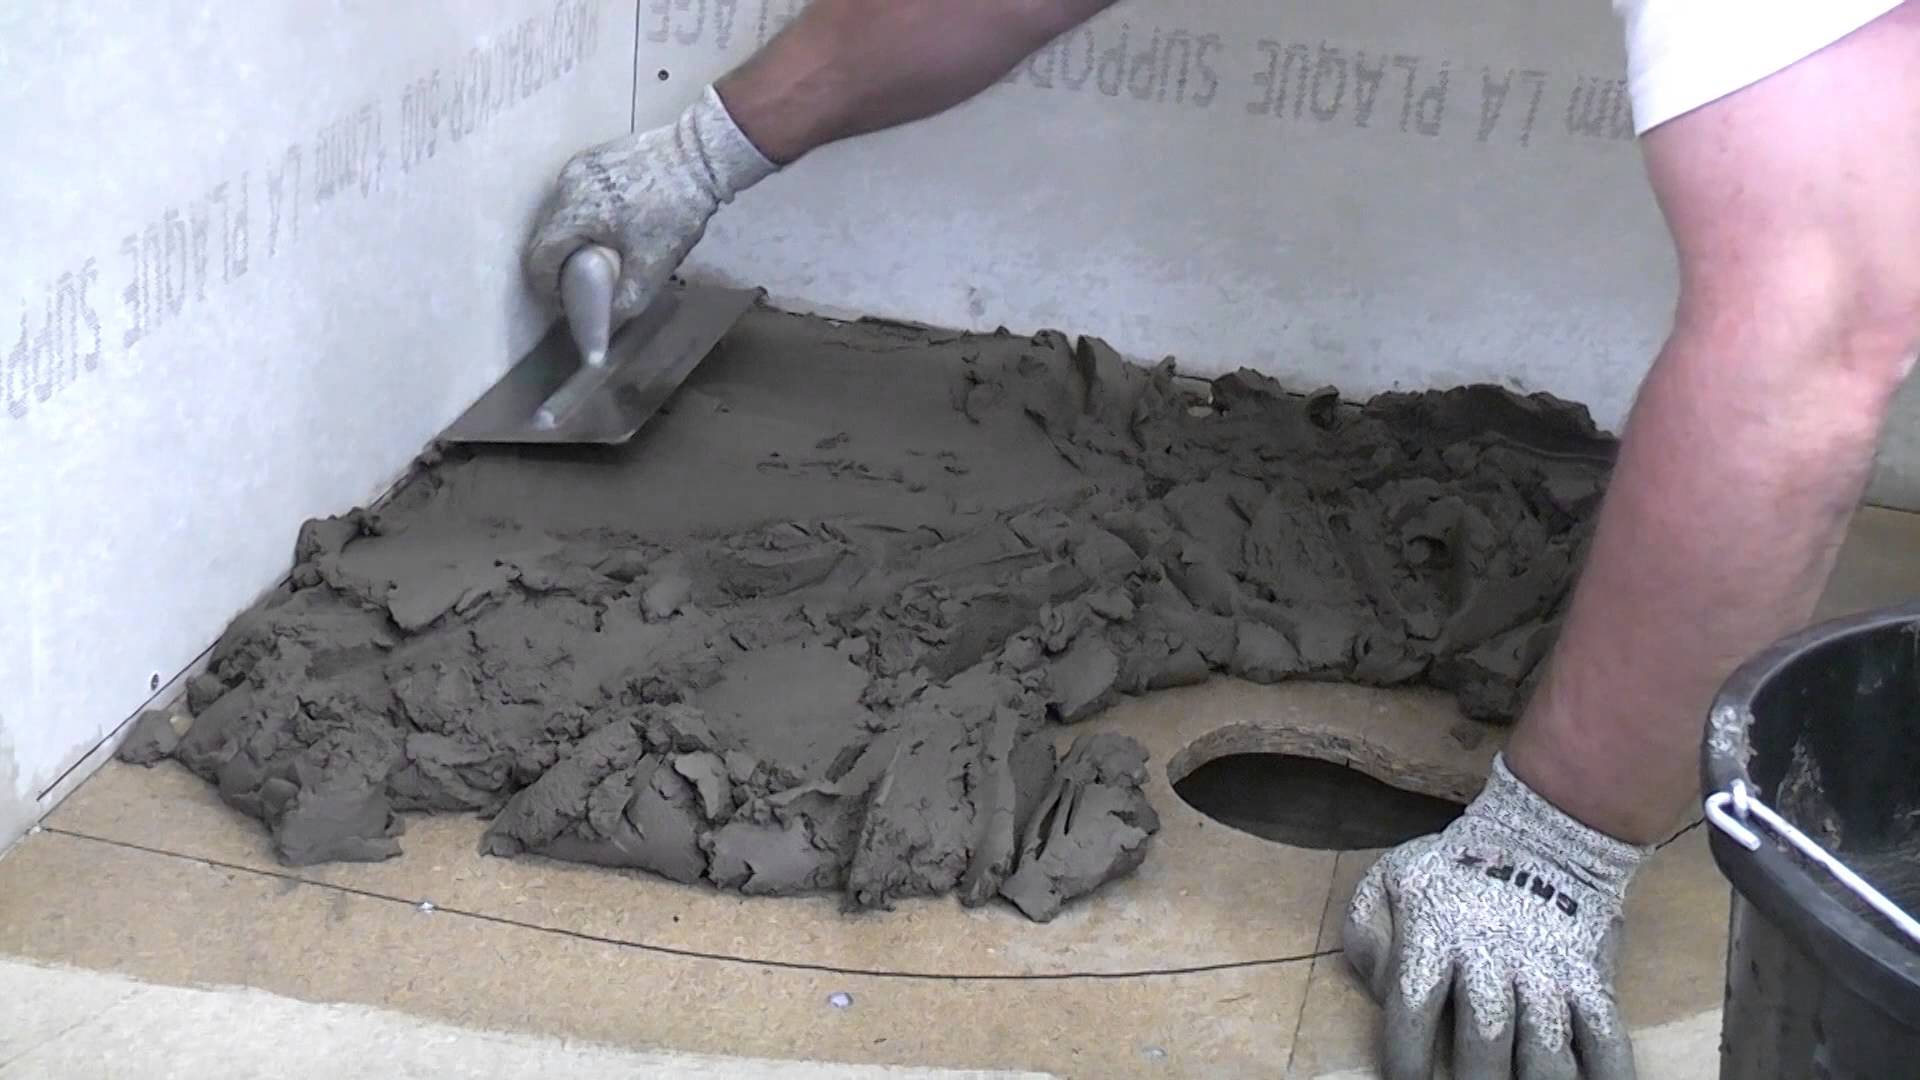
Do-it-yourself shower cabin with a pallet: installation of the base
Making a shower cabin with your own hands with a pallet is more laborious in terms of construction work, but communications are much easier to install. The height of the pallet allows you to easily bring the sewer pipe to the drain hole.
In this case, waterproofing can be done along the floor or inside the pallet, and for reliability it is a good idea to do both here and there. This is guaranteed to protect the floor from leaking, which means that you will not have problems with neighbors:
- Floor waterproofing, utility wiring and cement screed are carried out in the same way as in the case of a shower cabin with a pallet. At the same time, when setting the ladder, be sure to check that its top coincides with the level of the bottom of the future pallet.
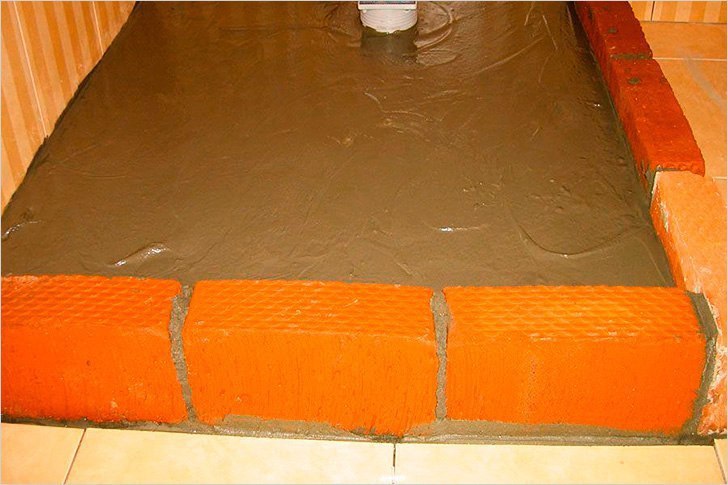
- Then you need to organize the pallet. For this, as a rule, ordinary brick is used, from which a parapet with a height of 10-15 cm is laid out. After laying the material, it is imperative to check the level of the pallet, otherwise the subsequent installation of the doors will be quite problematic.
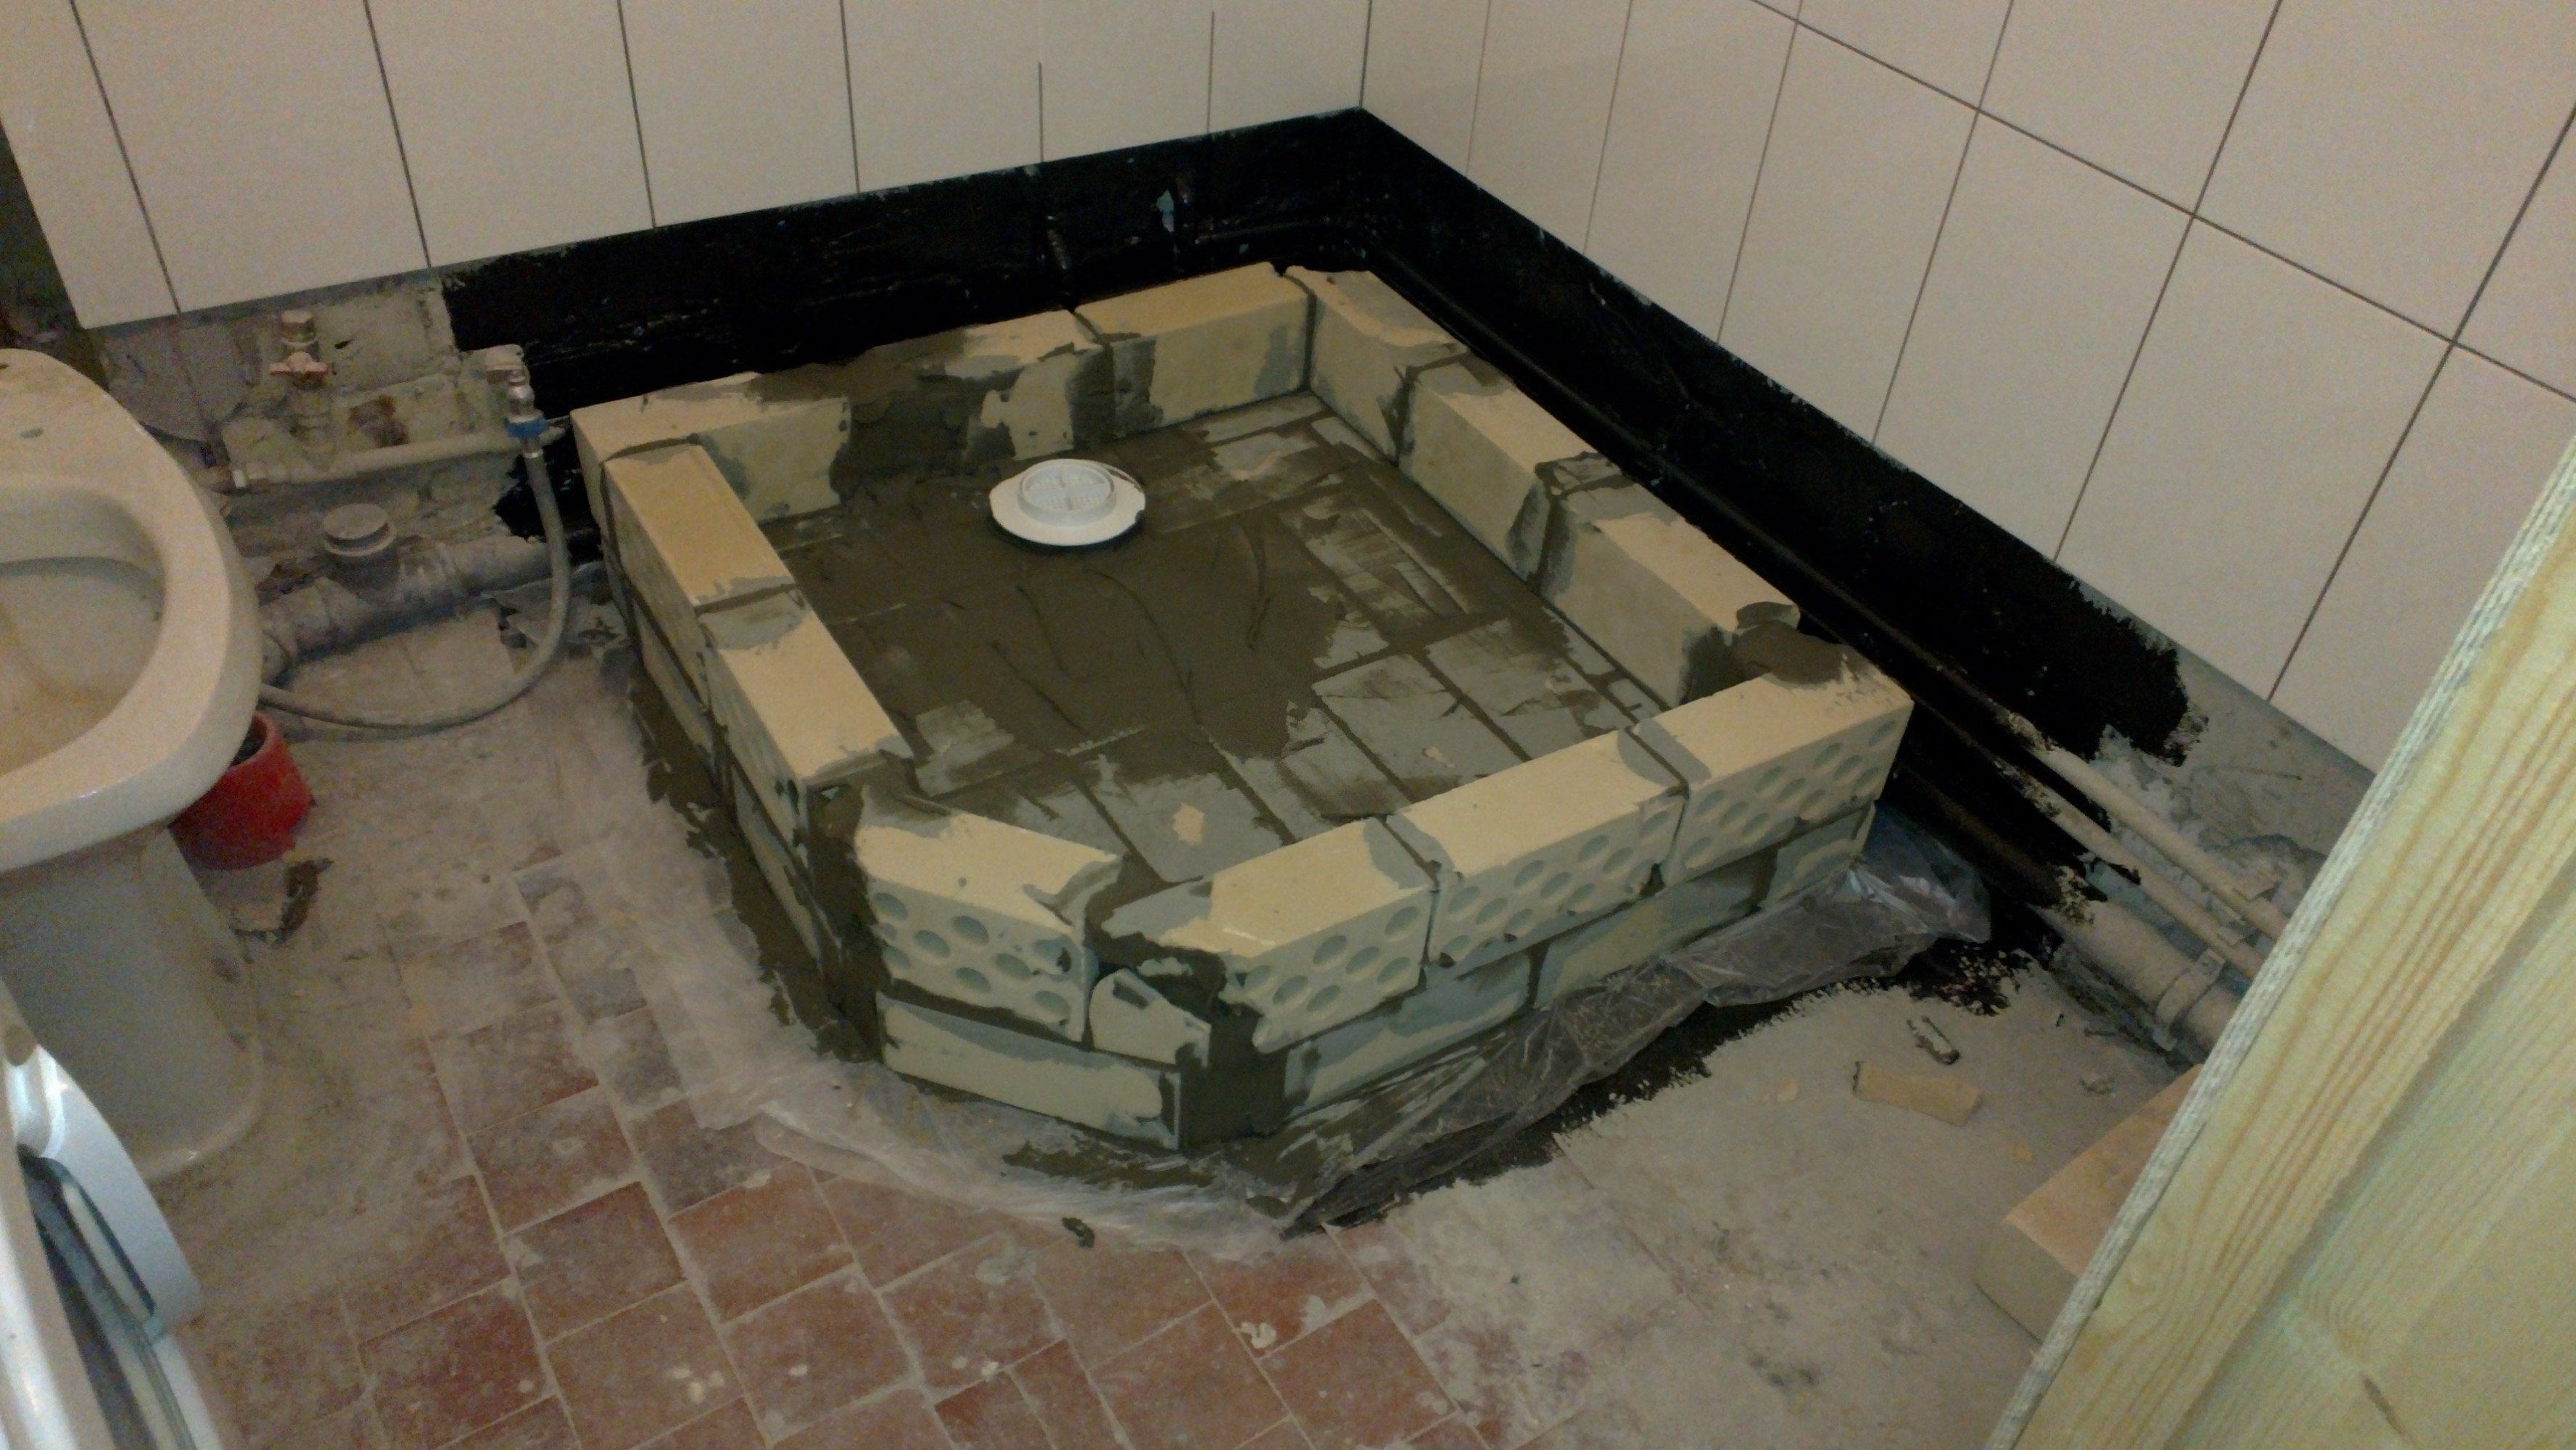
- Now the pallet itself is waterproofed. They use all the same bituminous mastic or modern waterproofers. A special gasket is also installed on the ladder.
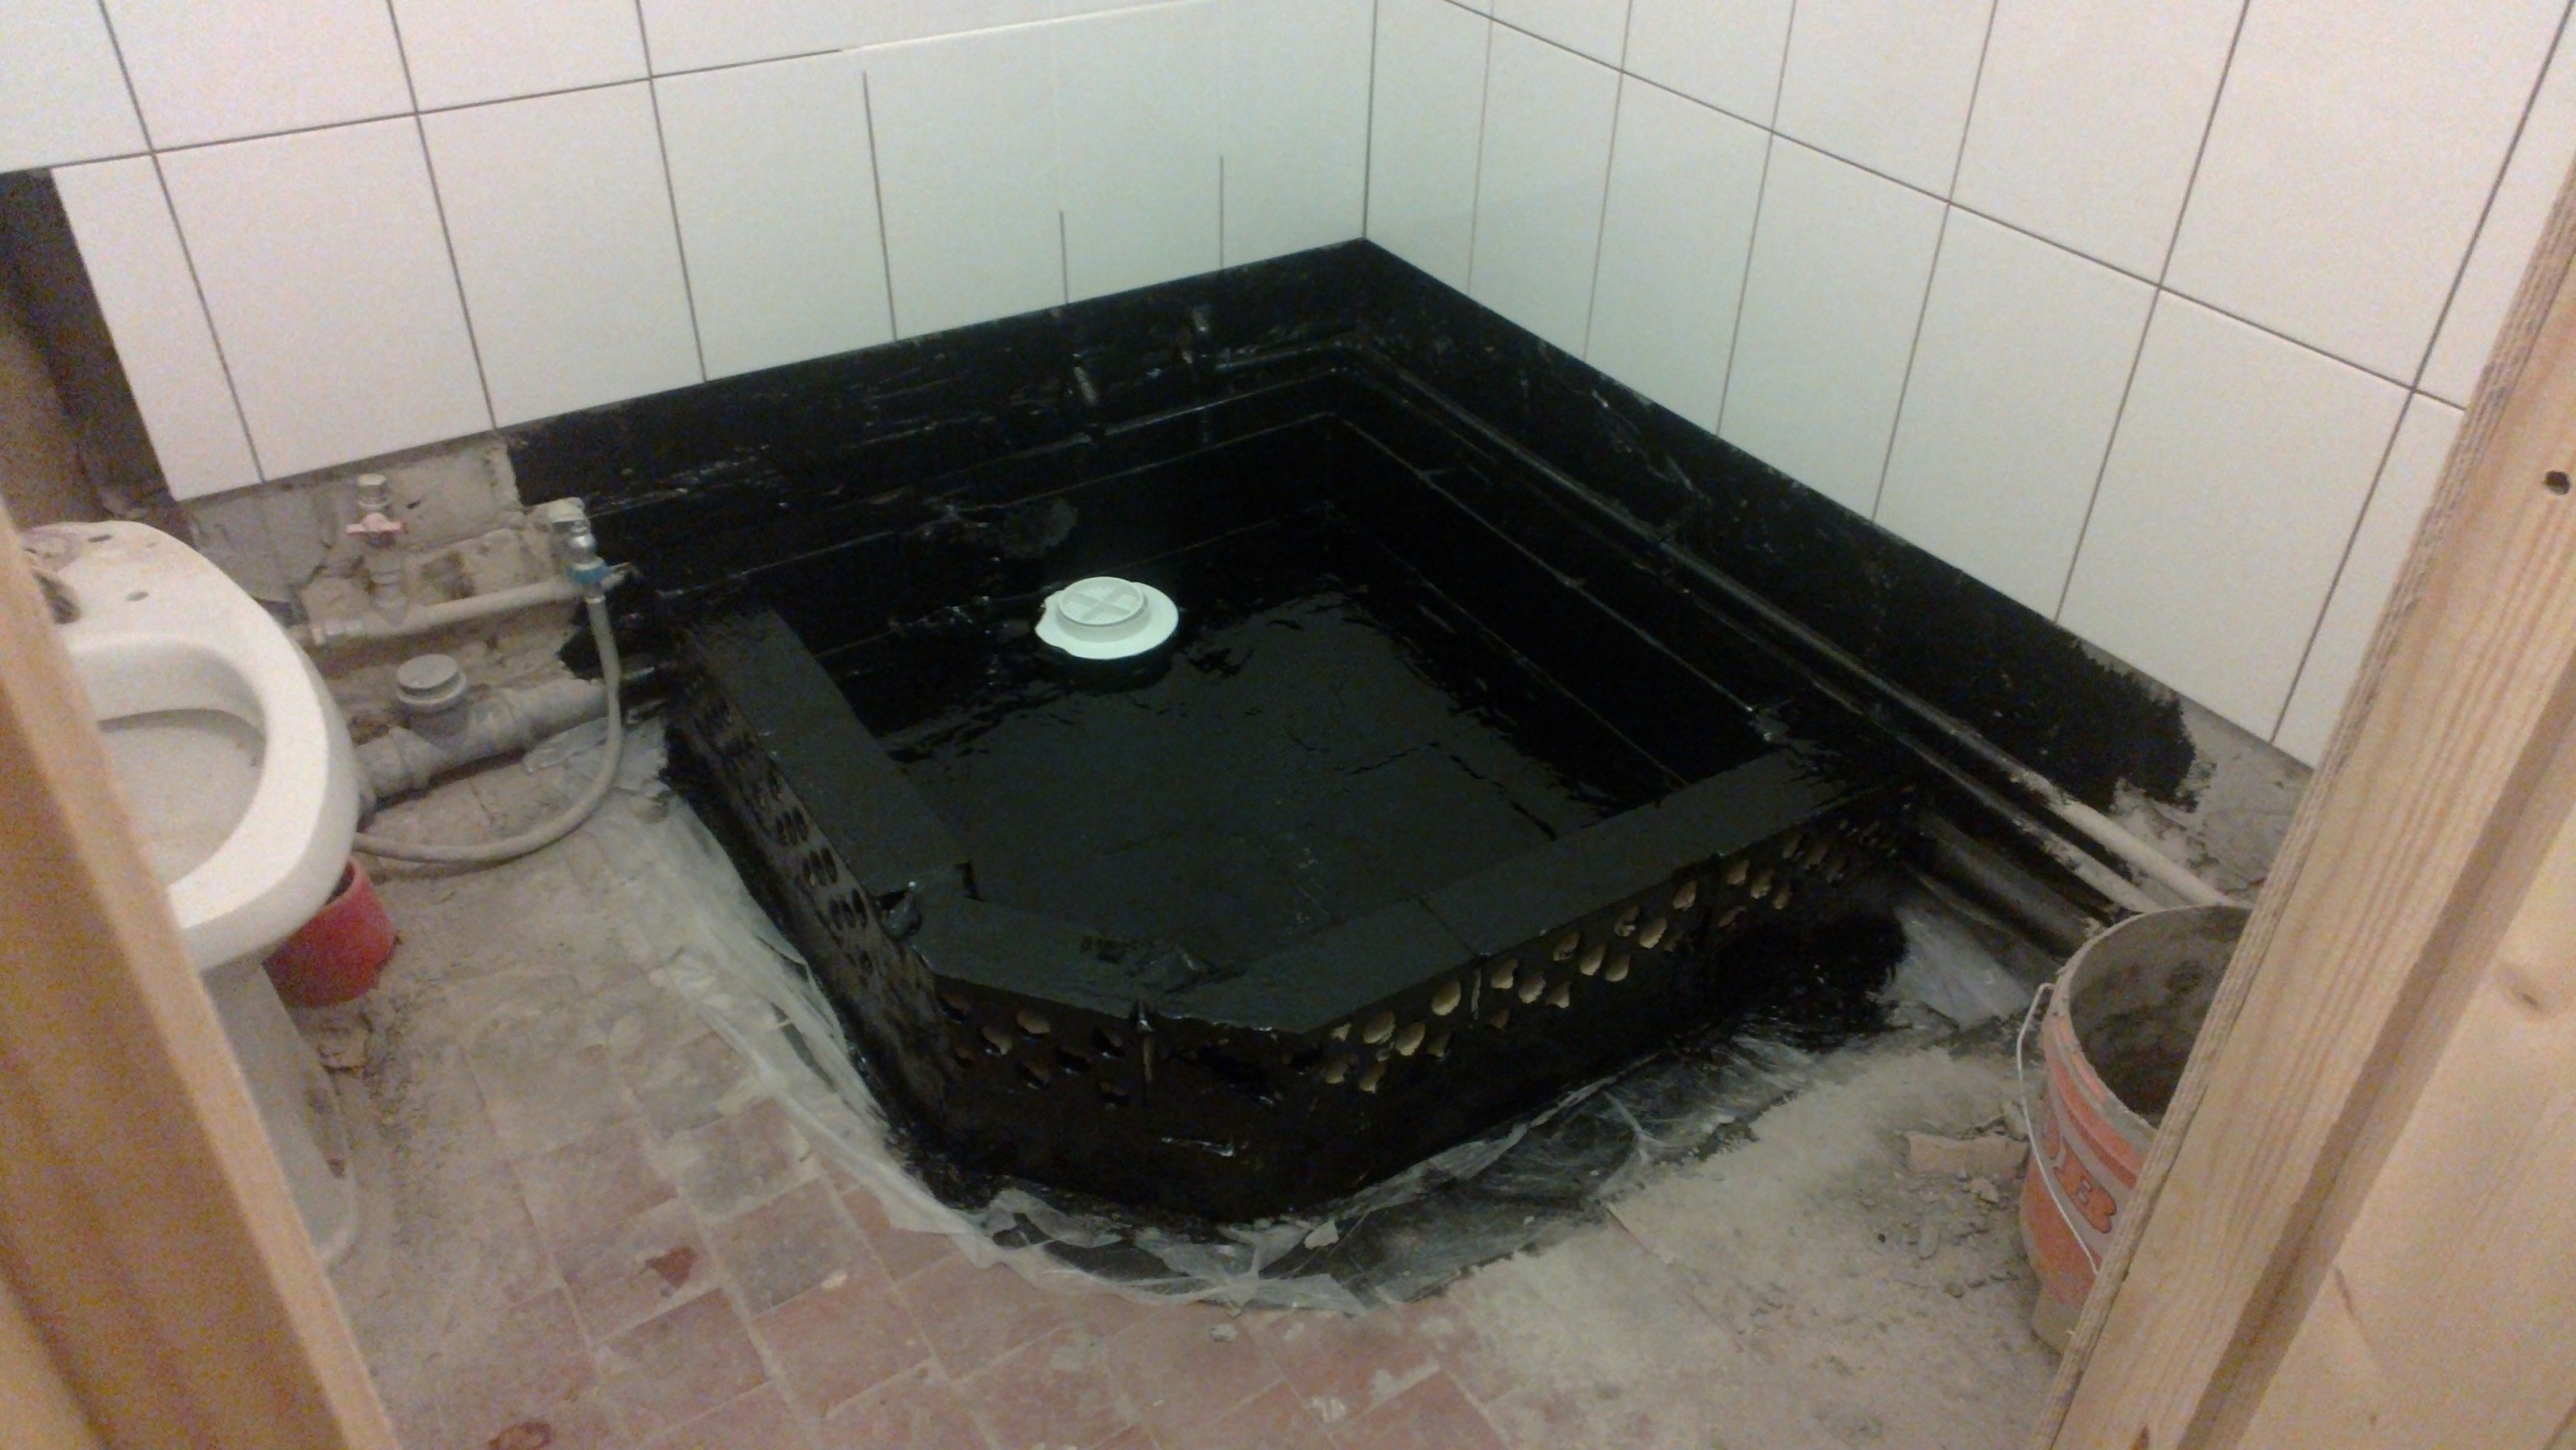
- Aerated concrete or any other filler is laid on top of the insulation and poured with another layer of screed, taking into account the slope towards the drain hole.
If an additional side partition is planned during the manufacture of the shower cabin, the low walls can be made of the same brick. For floor-to-ceiling structures, it is better to use moisture-resistant drywall, mounted on a metal profile frame. Subsequently, the partition, like the walls, is faced with ceramic tiles. This approach will reduce the load on the floor, and installation work will be easier.
Shower cladding and equipment installation
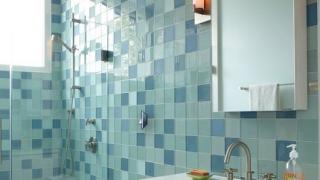
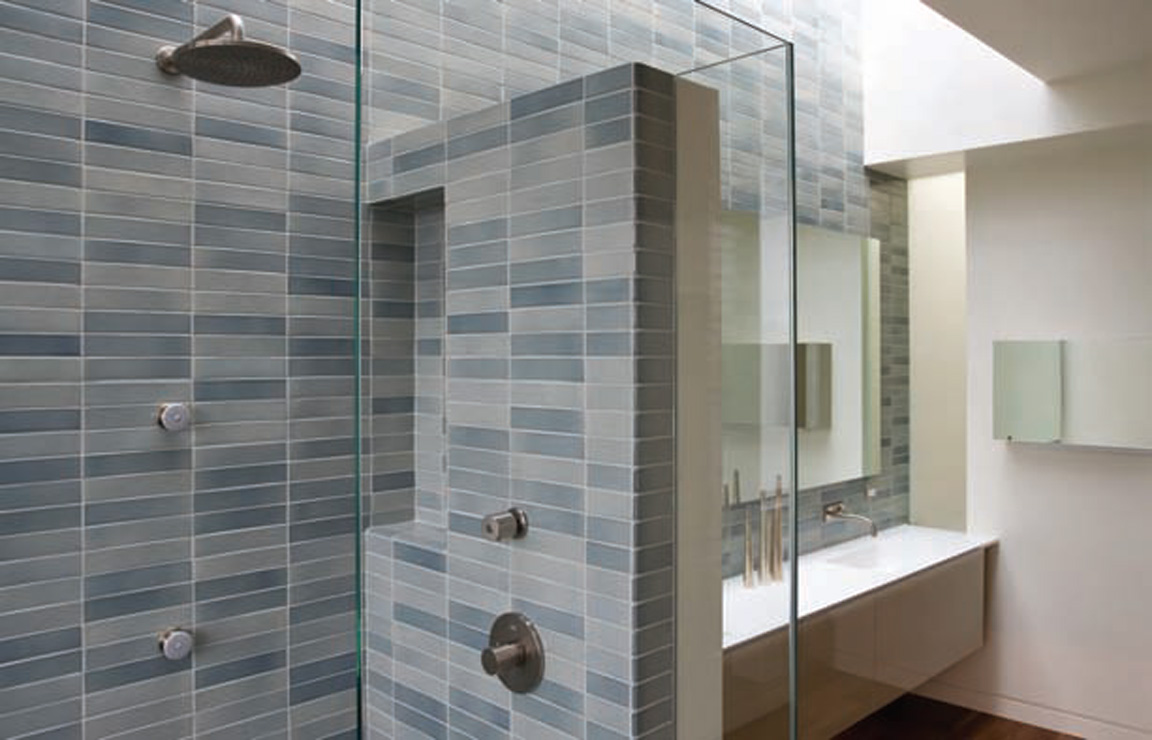
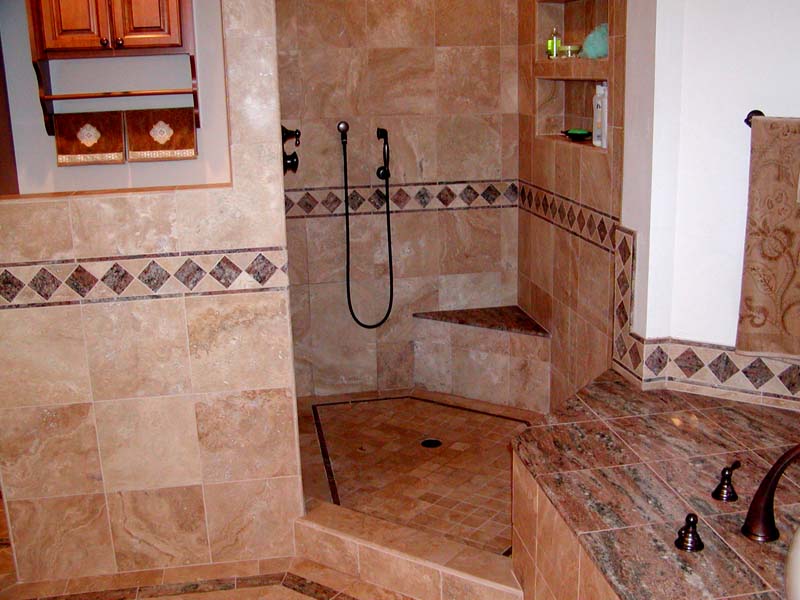
The surface finishing of the shower stall is carried out according to the general technology of laying ceramic tiles. As a rule, for this purpose, tiles of medium and small sizes are used; excellent results are obtained when facing with mosaics.
For the floor, it is better to use tiles with a rough anti-slip coating.
It is better to hide the pipes for the water supply behind the cladding. For this, grooves are preliminarily made in the wall, into which communications are laid, a mixer is installed and the surface is finished.
You will also need to conduct electrical wiring for lighting and ventilation. It is better to lay it at some distance from the pipes and observe all fire safety measures. Therefore, whenever possible, the wiring is mounted on the outside of the shower room and must be protected by an RCD.
If it is planned to install additional equipment, for example, a "Charcot" shower or hydromassage, it is better to seek help from specialists. The installation of the instruments necessary for correct operation requires appropriate experience and knowledge.
After installation of the equipment, all surfaces are tiled with ceramic tiles using conventional technology. In this case, it is better to use a special sanitary sealant as a grout for joints. It will not only protect against leakage, but also prevent the appearance of mold and mildew at the joints of the tiles.
Choosing doors: shower cabin made of glass or acrylic
There are several door design options for homemade showers. The most commonly used material is cast acrylic, which is quite easy to process. Or you can make glass shower doors:
- You will need cut-to-size glass (can be ordered from the workshop) and the corresponding fittings: awnings, handles, etc. All of this is sold in specialized stores. If part of the cab walls is also made of glass, corners for installation are additionally purchased.
- The only drawback of this choice is the high fragility of the glass and a high probability of injury if it is damaged. You can partially protect yourself by sticking a special film on the surface, in which case the glass will not crumble into small fragments upon impact. Or use another option, make the shower doors from tempered glass. But then you don't have to think about saving.
Cast acrylic (in the past it was called plexiglass) is more shock-resistant, moreover, its scope of application is somewhat wider. With a certain skill, even curved sliding doors for a shower stall can be made from acrylic. This will require a hair dryer, a template and a little experience with similar materials. You will also need guides on which the door leaves, rollers and metal profiles for the racks are subsequently attached. All this is assembled into a single structure, and as a result, you get a practical and inexpensive shower stall.
If working with acrylic and glass seems too difficult for you, you can purchase the required components from the factory model manufacturers. Even if it comes out a little more expensive, the installation will go much faster, and the booth will practically not differ from the industrial version.
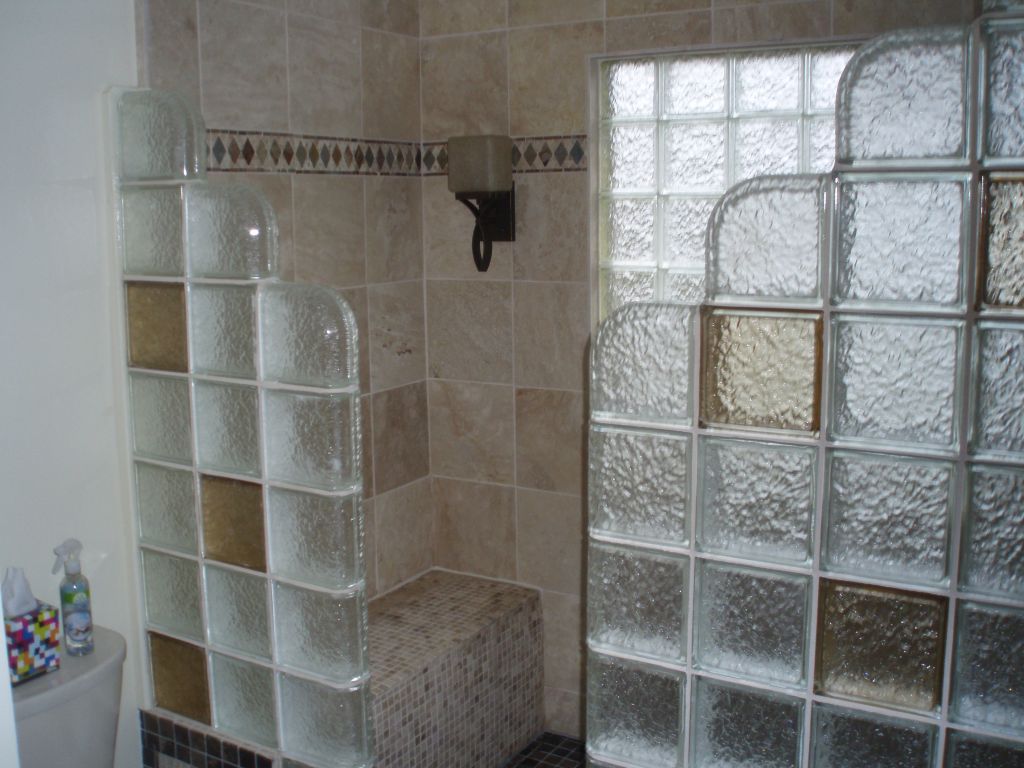
Shower cubicle made of glass blocks: original and attractive
Modern materials and technologies today make it possible to produce the most original interior items. So, relatively recently, a new material has appeared that allows you to revive the design of the bathroom: a glass-block shower can become a real highlight of this room.
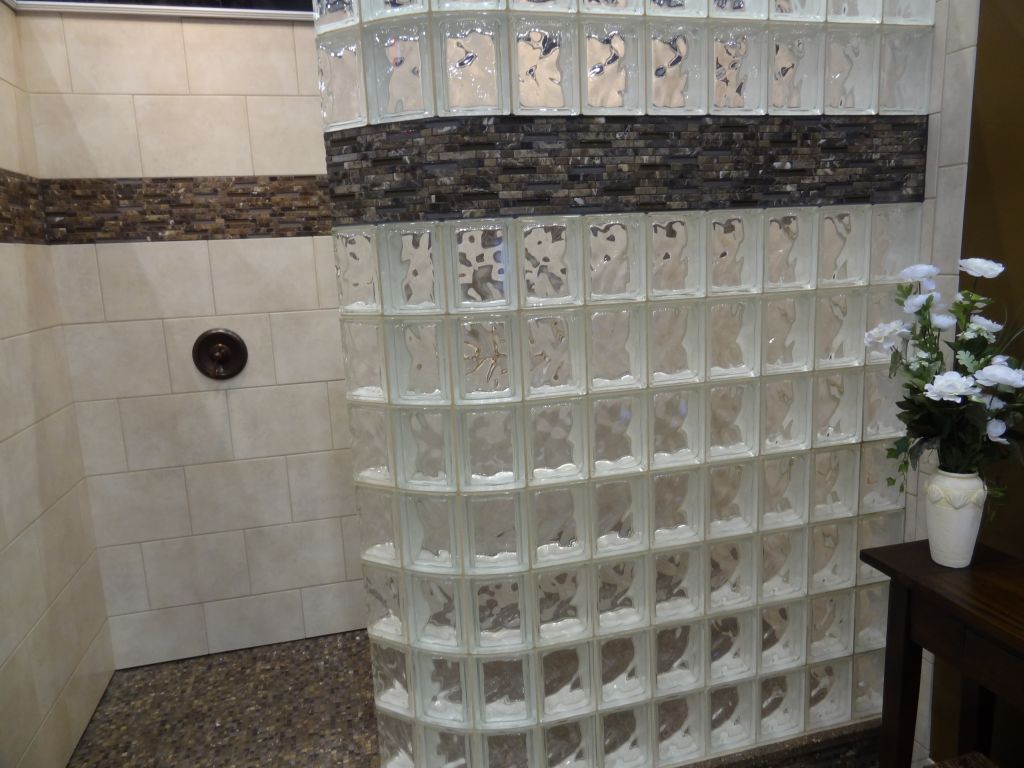
Thanks to the huge variety of colors and design ideas, choosing the right material for your bathroom is easy. Shock-resistant and durable blocks, devoid of the main disadvantages of glass, are available with a corrugated and smooth surface, matte and transparent, and even with an internal filling. The free space inside this kind of brick can be filled with various decorative elements: shells, corals, algae and other objects (usually marine themed).
Another advantage of this material is the ability to manufacture both flat and curved partitions with almost any radius of curvature. At the same time, the installation of the wall is simple and does not differ much from laying ordinary bricks. As a bonding mortar, you can use a cement mixture or adhesive for ceramic tiles.

If the installed partition has an area of more than 15 sq.m. a special reinforcing system is used for installation. At the same time, remember that such walls are non-bearing structures, which means that when hanging strips or cabinets on them, be careful.
In general, the glass block shower cabin is extremely practical and durable. This design is easy to maintain, since dirt and mold do not linger on the glass, and what remains can be easily removed with a non-abrasive detergent. And such a shower room will serve for many years without losing its originality and attractive appearance.