Updating or replacing an old, worn floor in an apartment is one of the most time-consuming operations in the overall renovation process. Just imagining all the scale and cost of the future, many homeowners very often refuse to repair the floors, limiting themselves only to changing the decorative coating on them. But time takes its toll, and sooner or later the moment comes when it becomes simply impossible to delay such work.
In this case, it is not at all necessary to immediately look for a team of craftsmen - especially since in such a service sector one can often meet frank "hacks". As a result, everything can result in a completely unnecessary waste of time, nerves and money with a low-quality result. Why not try doing it yourself? If the owner has certain skills in general construction work, and if you repair the floor in the apartment with your own hands in stages, in compliance with the recommended technological rules, then everything should work out!
The stages of repair, of course, depend on the type of floors, their initial condition, the purpose of the premises in which the work is being carried out, and the type of finish. In this publication, several of the most common options will be considered.
Since the owner of the apartment is thinking about repairing the floor, then, most likely, there are motivating reasons for this, unless, of course, this is a cosmetic replacement of the coating due to another whim of the wife. Therefore, first you need to identify and clearly formulate problems - the whole scale of further preparatory and repair work will depend on this.
This publication is about a city apartment, and in the vast majority of multi-storey buildings, any floor has a base in the form of a reinforced concrete floor slab. But here the further design can already differ significantly. The floor can be arranged on logs fixed to the base, or laid directly on a concrete screed.
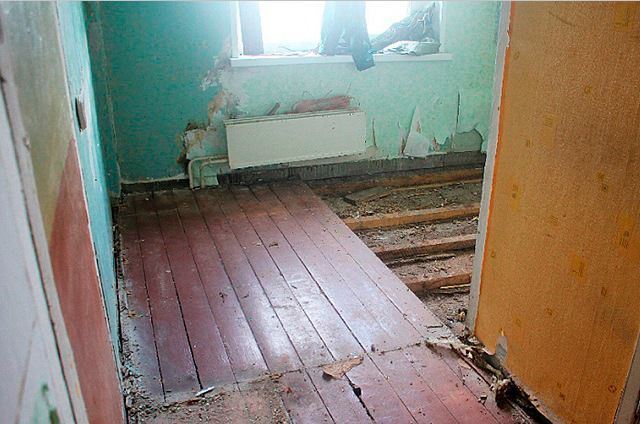
- The wooden floor on the logs usually begins to show its defects with a creak, instability of the coating - the floorboards “play” underfoot, the appearance of an unpleasant smell of rot, the formation and gradual expansion of cracks. Even worse, if suddenly one of the boards cracks or its fragment falls down.
The dilapidated wooden floor reminds of itself with a creak and "playing" boards
- The old screed, on which the coating is laid, from “old age” can also begin to present surprises, especially if it was once filled with poor quality. So, the appearance of obvious squeaks and rustling from sand or small pebbles, the “floundering” of the screed, the appearance of washed out areas of the surface, the violation of the evenness of the finish coating, and sometimes the obvious instability of the whole large fragment are also not excluded.
In any case, if there are obvious defects, remove the old coating.
Removing the old coating
- All furniture will need to be removed from the room, completely freeing it for further work. If repairs are not carried out in the entire apartment at once, but from room to room, it will be necessary to provide protection against the spread of dust, for example, by covering the entrance with a curtain made of thick polyethylene film or a frequently dampened cloth, and covering the gap under the door with a roller of a wet rag. True, the full effectiveness of this method is very doubtful, and the best option is to provide for the resettlement of family members for the duration of the repair. However, a dust barrier is necessary in any case.
- Next, the old baseboards are removed. Do this carefully so as not to damage the bottom of the walls to which they are attached. If the plinths are supposed to be used further, then they are numbered according to their location and temporarily removed.
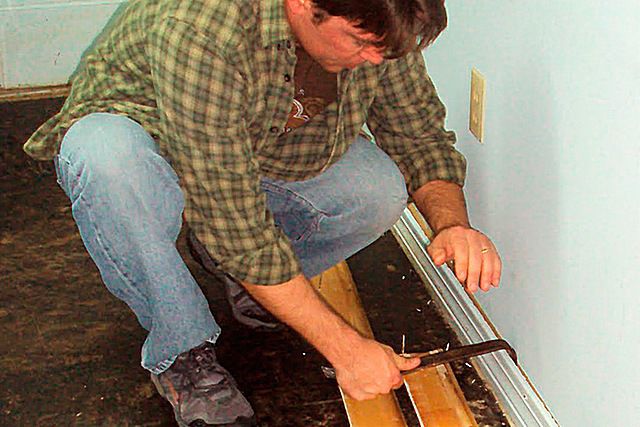
If someone has not come across this case before, then we can remind you that the skirting boards are attached to the wall, and not to the floor surface, that is, you need to correctly direct the lever force. It will be easier if the skirting boards are fixed on self-tapping screws or on special brackets.
The next step is actually removing the old coating. There are several options here:
A. If the floor is covered with some kind of rolled material, then it is hooked on one of the sides and they try to carefully roll it into a roll - this will make it easier to take it out. In the event that the coating (for example, linoleum or carpet) was once laid without glue, directly on a concrete screed, this will not be difficult to do. You can first, to facilitate the action, make parallel cuts with a sharp construction knife, thereby dividing the entire canvas into several narrower tapes.
But often there are situations in which the old material departs along with the layers of the exfoliated screed. Then you will have to remove it fragmentarily and immediately take it out of the room along with pieces of concrete so that this construction debris does not interfere with further work.
It happens that once high-quality glued linoleum, when removed, begins to delaminate itself, leaving dried layers on the screed. In this case, you will have to work with a scraper (spatula), warming up these areas with a building hair dryer or moistening the old adhesive layer with a floor detergent solution.
B. More trouble can deliver the old "playing" parquet. If it is of no value, then its dies are sequentially removed, immediately loaded into bags, which are taken out as they are filled. If the parquet was once glued to bituminous mastic or organic-based glue, then the removal of individual dies or even entire fragments can be difficult. The "recipe" is the same - a scraper, a chisel and heating with a hair dryer.
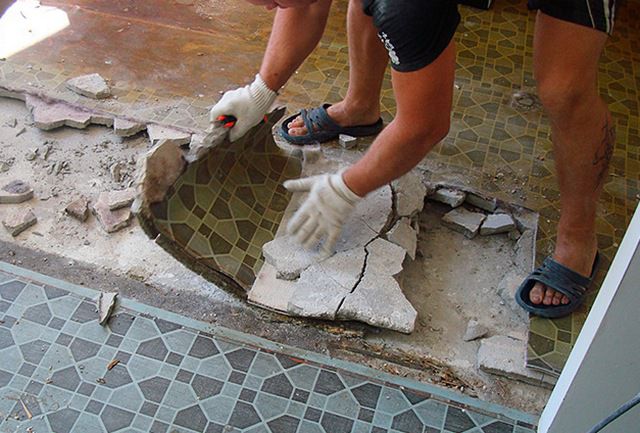
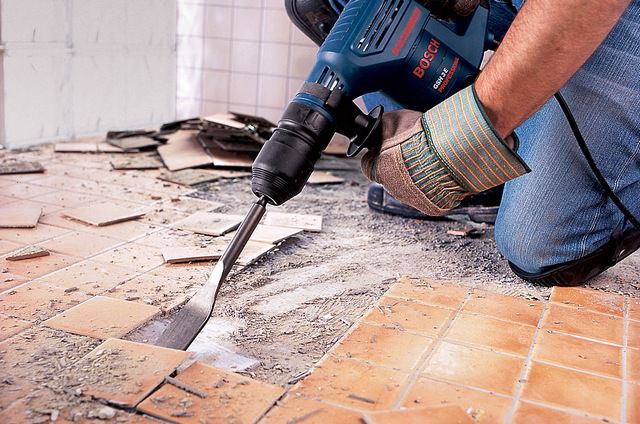
IN. To remove the old tile, it is most convenient to use a puncher switched to chiseling mode with a chisel-shovel installed. If such a tool is not available, then everything is done manually, using a hammer and chisel.
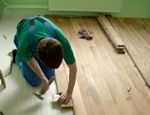
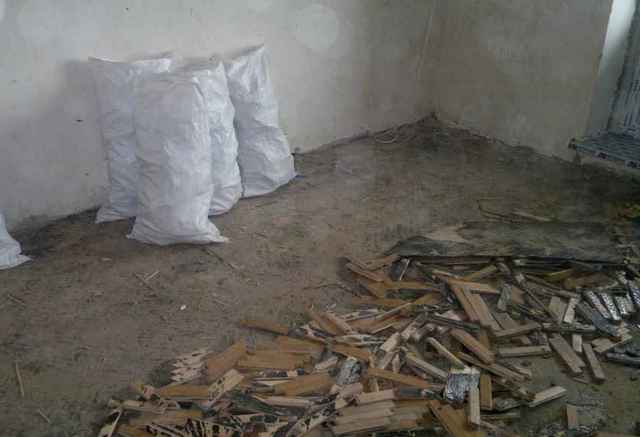
G. When stripping a plank floor, the hardest part is probably picking up and separating the first floorboard. Further, when it will be possible to freely start the lever, the work will go faster. For work, you will need a nail puller with a long lever handle, a hammer, and pliers. You need to try to take out the nails carefully, without destroying the boards, since, quite possibly, this material will still serve for a new flooring after repairs or for making logs.
If the old coating was fastened with screws (self-tapping screws), then you can try to dismantle it with a screwdriver.
Well, if the plank coating is no longer of any value, then it will be most convenient to make cuts using a manual vertical circular (carefully and prudently so as not to hook the concrete base, not damage the logs and not “run into” a nail). After such a separation of long floorboards, their removal will be an easy task.
Is it worth removing the entire plank flooring if obvious defects were observed only in certain areas, and there are no plans to replace it with a different type of surface finish? Of course, you can limit yourself to only partial repairs - the replacement of worn or deteriorated parts. But experts unanimously advise - shoot everything completely. There is no guarantee that if the decay process manifested itself in one area of the floor, then it will not show itself in another in a year, or even earlier. It will be cheaper to renew the base and re-lay the floor, even using old material, than to return to such repairs again after a short period.
Foundation audit
After the floor covering is removed, it is necessary to carefully examine the base.
- If there are logs left on the floor, and it is planned to re-lay the boardwalk, then you should carefully check the condition of these load-bearing elements and the supports on which they are installed. Log beams should not have areas of decomposition, rottenness, fungus damage - such parts are subject to mandatory replacement. Each lag is checked under load - it should not hang out, bend, creak, etc. If necessary, update the linings that hold the guide at the desired height.
If the state of the lag does not cause concern, then after a thorough cleaning in the spaces between them it will be possible to lay a new coating. Perhaps most old floorboards are fine for this. After such a bulkhead, the floor will stop creaking and gain the necessary stability. If required, thermal insulation material can be laid between the lags, which will also take on the role of a sound insulator.
However, on an old wooden floor, very often the logs themselves are quite worn out, and their repair is impossible or does not guarantee durability. In this case, they will have to be dismantled in order to subsequently install new ones. When removing the lag, remember that they can be firmly attached to the base base. It is necessary to exercise accuracy and discretion in order to prevent a strong destruction of the concrete base and not add unnecessary worries to restore it.
After removing the lag, the most thorough cleaning of the base of the floor is carried out so that you can proceed to the next steps.
In the event that, after removing the old topcoat, a concrete screed opens under it, it is most carefully examined. It must be assumed that the concrete is strong in itself, and repair of such a surface is optional.
The screed must be tapped - this will help to reveal areas of its delamination, which must be removed to a “healthy” base. The surface is checked for the presence of loose places, those where, due to a violation of the pouring technology, the solution did not gain strength or was eroded due to moisture. These areas also need to be cleaned.
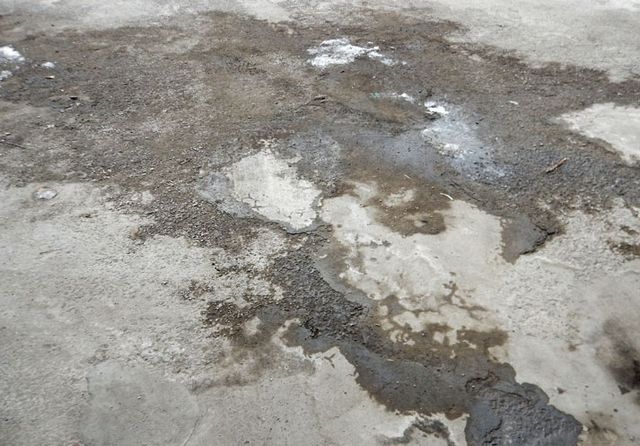
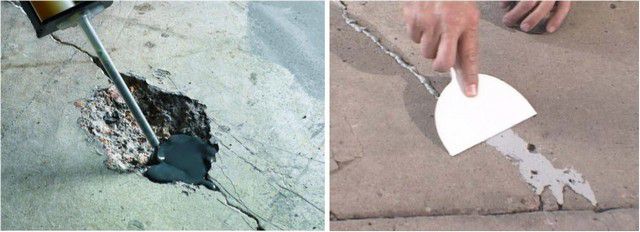
It should not be left on the surface of large cracks - from here the process of destructuring of the base may continue. Slots and cracks lie cutting in breadth and depth of at least 10 - 15 mm, for subsequent repair.
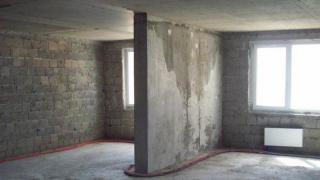
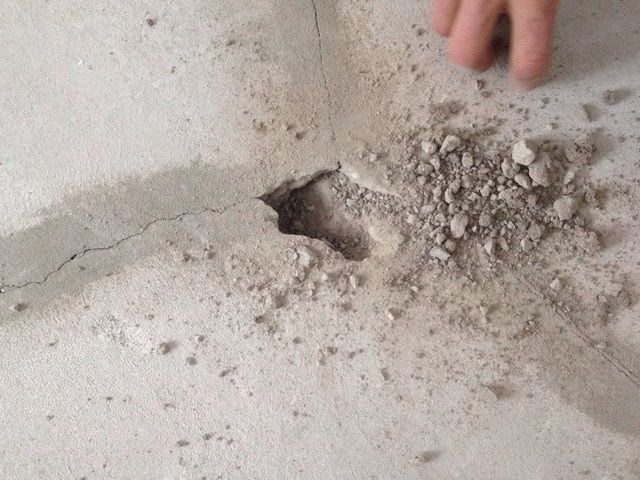
Sometimes, after removing unstable sections of concrete, a generally unsightly picture opens up, such as, for example, as shown in the photograph. However, it is quite repairable.
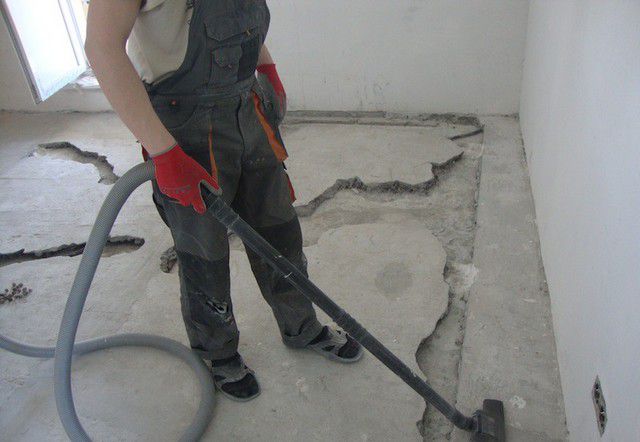
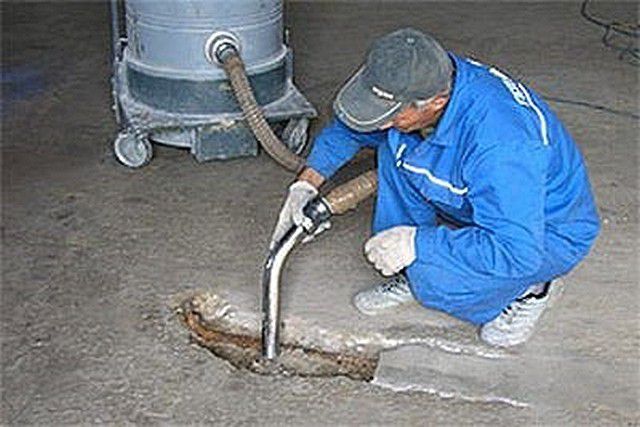
After removing defective areas and cutting cracks, a thorough cleaning is carried out. It is best to use a powerful construction vacuum cleaner in this matter - by other means it is extremely difficult to clean the surface and the resulting cavities from small debris and dust.
Sometimes you have to resort to the complete dismantling of the entire screed to the floor slab. This can be caused by the extremely low quality of the coating, which is impractical to repair, but it is better to refill completely. Often, mold or fungus finds a “shelter” in a screed in damp rooms. Another option is when the floors require additional insulation and sound insulation, and the height of the ceilings and the dimensions of the doorways in the apartment will not allow raising the level of coverage (taking into account the thermal insulation layer and finishing). The same measure is resorted to when it is planned to make a wooden floor on logs instead of thin coatings.
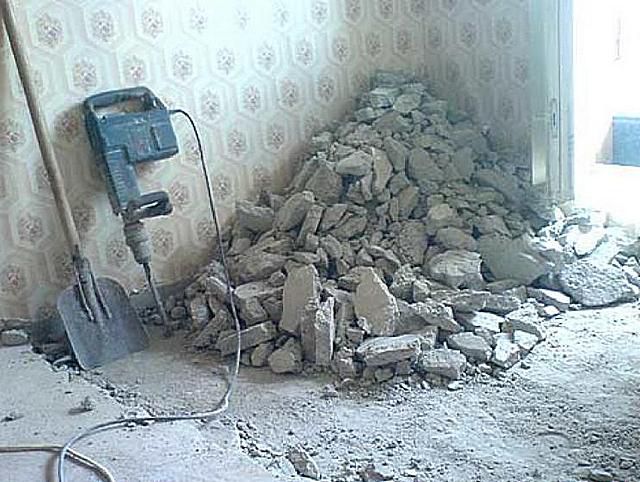
A difficult, but often simply necessary operation is the complete removal of the old screed
Of course, the process of completely dismantling the screed using a jacking tool is very tedious, noisy and dusty, but no other way has yet been invented. This requires some care not to damage the concrete floor slab. The screed is cut off in separate pieces, which are immediately raked to the side with a shovel and packed in bags for export. It is not recommended to use even small fragments as a material for filling a new solution, since they will not enhance, but, on the contrary, worsen the quality.
After removing the old screed, a thorough cleaning of the surface is carried out - as described above.
Base surface repair
What was the floor was not planned in the future to the flooring, the concrete base under it must be put in order. So, poorly sealed seams between floor slabs, cracks along the perimeter of walls, potholes or cavities, etc. can be exposed.
Such repairs are necessary even if it is planned to fill a new screed. The solution may not penetrate into these flaws, there will be air cavities that reduce the solidity of the coating and become the starting point for the destruction of the screed. This is all the more important and mandatory if the screed is to be poured onto a separating layer or onto a waterproofing film (floating screed).
All surface defects must be thoroughly cleaned, if necessary (for example, slab joints) cut, and then remove even the smallest crumbs and dust with a vacuum cleaner.
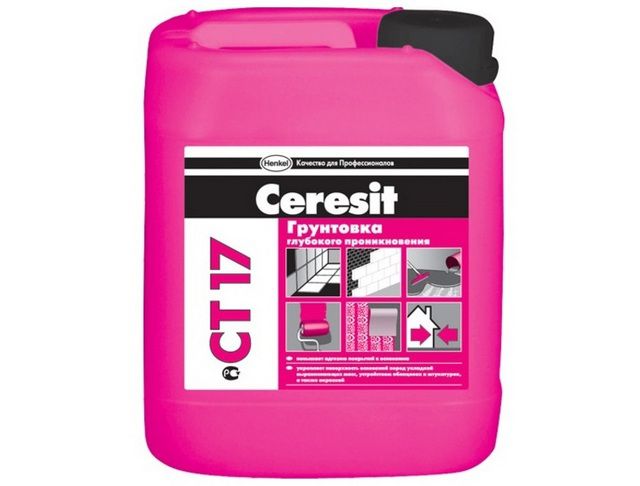
In the next step, the surface is carefully, at least twice, primed with a deep penetration composition, which is designed specifically for concrete.
Such treatment will significantly strengthen the surface, which is especially important when it is loose, increase the hydrophobic qualities, reduce the absorbency of concrete, and improve adhesion with repair compounds. They proceed to further work after the last applied layer of soil is completely absorbed and dried.
As a repair composition, you can use a conventional cement-sand mortar. However, it dries and gains the necessary strength for a long time, and it is better not to spare money for special repair compounds, also on a cement or epoxy basis.

The primed defects of the surfaces are filled as densely as possible with a repair compound, compared with the general level of the floor. To do this, you can use a regular spatula. Some repair compounds are sold in plastic tubes, and it will be more convenient to apply them using a construction syringe or a special “gun”.
If the defect is large in volume, then in some cases it is possible to resort to filling it with mounting foam. After it dries, the excess is cut off, and then this area is brought to the general surface level with a repair staff.
Repair "patches" are given time to completely solidify, in accordance with their instructions, after which you can trim the surface with sandpaper wrapped on a bar. Then it is recommended to walk again over the entire surface with a primer. If an increased absorption of the composition is noted at the repair sites, then primed twice in these areas.
After the soil has dried, the surface can be considered ready for further work.
Leveling screed
If an old screed or wooden floor was removed and the floor slab opened, then most likely its level is very far from the horizontal. The house shrunk over time, and even during its construction many years ago, builders could not really care about the strictly adjusted level of floors. So, what kind of floor was not planned to be done further, it is recommended to strengthen the base and at the same time level it with a screed. The thickness of this poured layer must be at least 30 mm at its highest point.
First of all, it is necessary to determine the magnitude of the difference, that is, to identify the peak, highest and lowest points of the surface and “break through” the zero level line. A system of beacons will be set at this mark.
To fill the screed, you can use the usual cement-sand mortar, which is prepared right at the place of work. Usually they proceed from the proportion of three parts of sand to one of M-400 cement - this ratio gives an optimal surface in terms of strength and wear resistance, on which any of their existing floor coverings can then be mounted.
Those novice builders who do not want to get involved in self-proportioning can be recommended to use ready-made building dry mixes. Their composition is already optimized for the screed, and it remains only to properly close it with water, in accordance with the attached instructions.

How many materials will be needed in one case or another? It all depends on the level of height difference at the extreme points, the planned minimum thickness of the screed, the area of \u200b\u200bthe room, and the characteristics of the solution.
Usually, on the packaging of dry building mixtures, their normalized consumption is indicated in kilograms per 1 square meter of the area to be poured with a layer thickness of 10 mm. Based on this, it is possible, by simple calculations, to determine the required amount of material.
To make things easier for readers, here is a calculator that allows you to quickly and accurately make such calculations: